
Creating a supportive and nurturing virtual learning community in Zoom
Anxious about creating the conditions for a positive and productive virtual learning environment? Unsure how to build trust and a learning community via Zoom? You’re not alone! This page offers a few tips and recommendations for creating a supportive and nurturing virtual community in Zoom.
The following steps will help you backward design your learning community. You’ll start by determining the qualities and conditions of the community you want to create, then work through the various building blocks you’ll need to make that happen.
Remember, while creating community face-to-face often happens organically, replicating this in Zoom requires planning, structure, and intentionality. These tips encourage you to think of ways to amplify the affordances of the virtual, while minimizing the limitations of not being in the room together. Pandemic teaching is so much like the digital humanities — do the best you can with what you’ve got!
These recommendations come from a longer blog post written by Dr. Pam Lach.
Step 1. Understand your learning environment
- Determine the balance of synchronous Zoom sessions and asynchronous, independent learning. This should be based on the learning outcomes you’ve established for the course.
Step 2. Define your community
- Consider the specific qualities and conditions you want to cultivate among your students. For instance: trust, a willingness to take risks, care for self and others, compassion, empathy, respect, and the importance of making evidence-based claims.
- Consider, too, how you will protect those conditions. How will you keep the space safe for everyone?
Step 3. Articulate your hopes for community
- Write a set of shared values / community agreements that capture the community you want to create. These will help shape synchronous engagement. It’s best to start with your own set of principles, and then be willing to expand them during your first few Zoom class sessions. You could either ask students to share their ideas via Zoom chat or in a discussion thread on Canvas (see Step 4).
- Be sure to include a shared understanding of Zoom etiquette (see this example from a 2020 virtual summer podcasting institute held “at” SDSU’s Digital Humanities Center, in partnership with the National Humanities Center):
- Do you want students to be muted? Will you want them to raise their hands before unmuting? Will you require them to use their microphones or can they use chat instead?
- Cameras on or off?
- Use of in-class chat?
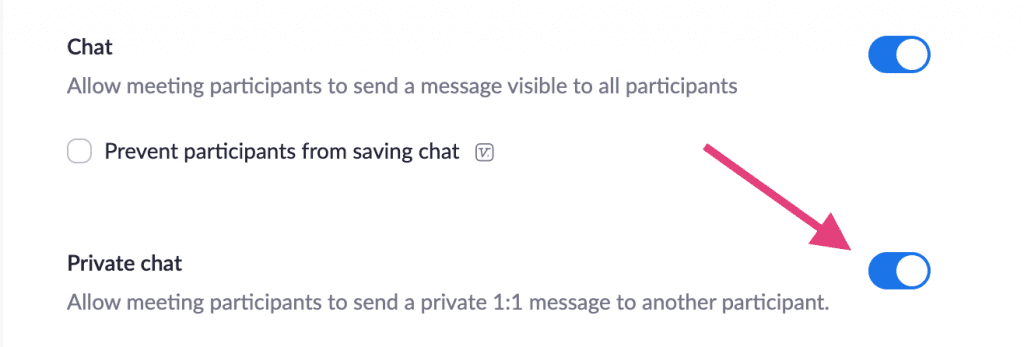
- Make sure to explicitly discuss the importance of safe and affirming chat speech. Remember, you won’t be able to see what one student says to another — unless you disable private chat (see screenshot below). You can only see what someone types to everyone. For example, you might caution students to engage each others’ ideas rather than personalities, avoid personal insults/attacks, use evidence to make claims, and be mindful not to use harmful/hateful language, such as racial slurs or stereotypes.
- Be as inclusive as possible. Consider students who don’t have a quiet room of their own, are housing insecure, are not comfortable showing their living conditions, and/or don’t have sufficient wifi signal to support their video feed. What sort of burden would it place on them if you require the use of cameras? If requiring webcam usage is essential to achieving your learning outcomes, what sort of alternatives can you provide to ease students’ discomfort — such as the use of virtual backgrounds (for students using newer computers)?
Step 4. Set expectations
- Distribute your agreements BEFORE and ON the first day. Send via email, post in Canvas (Blackboard), and include in your first set of class slides.
- Dedicate time at the beginning of the semester (ideally more than one class session) to review, discuss, revise, and revisit these agreements. Treat them as a living document, and adjust them as needed.
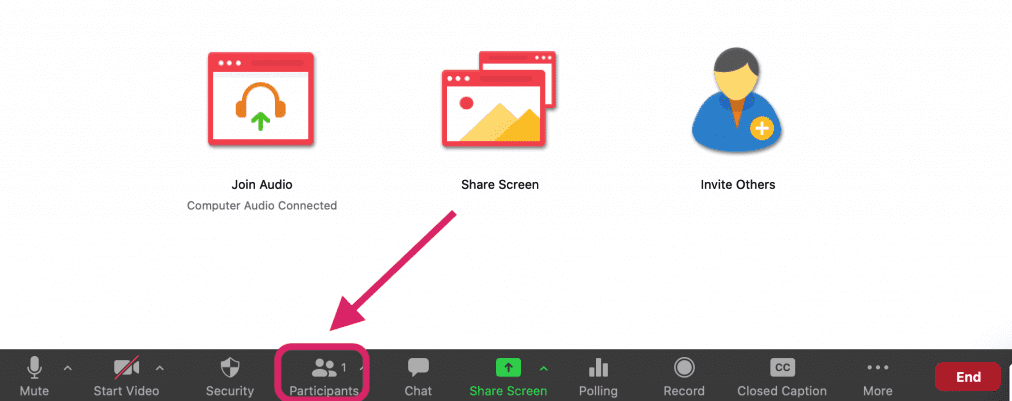
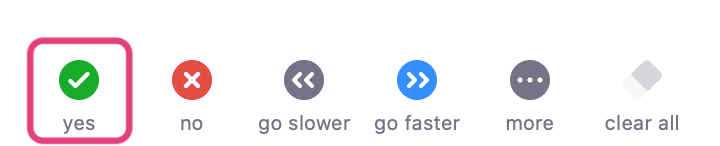
- Ask all students to explicitly adopt the agreements. You can use the voting feature in Zoom (Yes/No feature in the Participants panel – see screenshots below), or create a poll beforehand, or circulate a survey (Google Form or Qualtrics) via email.
- Make sure to weave these agreements and values throughout synchronous class discussions. This can be done in small ways – using the language of the agreements, referring back to them on a regular basis. Or, consider reading them at the start of each class session.
Step 5. Determine your communication channels and processes
- Determine how students will engage asynchronously – with you and each other. Via Canvas discussion boards? Email? What is the relationship of asynchronous communication to in-class Zoom conversations and Zoom chats? Make sure to articulate this to your students.
- How will you ensure safe, productive, and affirming Zoom chat? How will you intervene and be an upstander if something goes awry? (Need help with this? Check out the Center for Inclusive Excellence.)
- How will you keep in touch with your students to make sure they’re on track and getting the support you need? Perhaps a weekly email of reminders for the week ahead? Individualized emails to students who appear to be falling off?
- Consider how you’ll manage multiple communication inputs during Zoom sessions (not an easy thing to do!):
- Hand raising via the Participant panel
- Zoom chat (especially hard to monitor when you’re sharing your screen)
- Real time emails from students having trouble accessing the Zoom
- Waiting room (highly recommended) for students whose signal drops and have to re-enter
Step 6. Model your community
- Make sure to model and embody the values of your community.
- Set the tone you want on the first day and keep it going. Teaching via zoom takes a lot more energy and attention than face-to-face teaching, in part because of Zoom fatigue. How will you keep yourself energized? (Tip: don’t read the news before class!)
Step 7. Keep building your community
- Integrate and scaffold your shared values/agreements throughout the course (refer back to Step 4)
- Check in with your students about how it’s going. Do they want to amend the original community agreements? Address anything that’s happened in the class? Celebrate a success?
Step 8. Take care of yourself
- Give yourself permission to take breaks (especially in long class sessions), and build those breaks into your class schedule.
- Specify expectations for breaks. I recommend:
- Mics muted
- Cameras off
- Use the voting feature (in the Participants panel) or Reaction emojis for everyone to indicate when they’re back

Step 9. Celebrate your community
- Even if it doesn’t always go well, it’s important to celebrate the good times and encourage a spirit of mutual support and trust.
- Thank everyone for their engagement, every time, and encourage them to continue engaging in meaningful, supportive, and productive ways.
- Celebrate your own work to cultivate this community.
Additional tips
Injecting a sense of playfulness into your classroom
Whether you’re naturally funny or not, being playful in the Zoom classroom requires pre-planning and structure. Consider ways you might do this without pushing yourself out of your comfort zone, such as:
- Inserting memes and gifs in slide decks
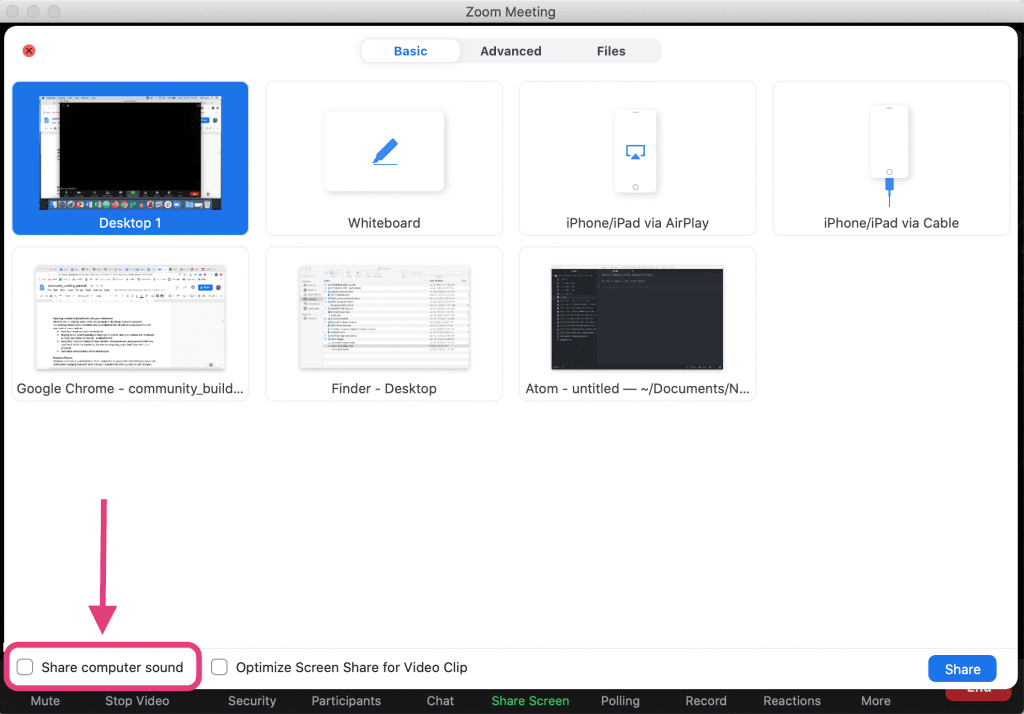
- Playing music at the beginning of class (you’ll have to share your screen and remember to share your computer sound – see screenshot). If you forget to share sound when you launch screen sharing, you can enable it at any time (click the … More option in the screen sharing menu at the top and then select Share computer sound).
- Using Zoom polls unrelated to class content — food aversions, places people wish they could be if not for the pandemic, favorite movie (polling works best if you set it up in advance)
- Icebreaker conversations at the start of class
Breakout Rooms
Breakout rooms are a great feature in Zoom, especially for group work and helping students feel comfortable engaging with each other virtually. Consider how often you want to use breakout rooms, and how using breakout rooms helps you achieve the learning outcomes for that class session. Also, think about how you’ll manage the rooms:
- Will students be assigned randomly to rooms? Will those room assignments shift over time?
- Will students work in the same groups all semester? Consider enabling the “Allow host to assign participants to breakout rooms when scheduling” setting IF you know the groupings in advance.
- How will you make sure that you visit each breakout room in a given session or semester?
- How will you hold students accountable for what happens in the breakout room. Will they report out to the entire class? Add notes to a shared google doc? Fill out a Zoom poll?
Remember the limitations of breakout rooms:
- You can only be in one room at a time
- Only one room at a time can call you for help
- You can communicate to all rooms (broadcast a message) but they can’t communicate back to you
Check out “Using Breakout Rooms with Less Stress and Better Results” to learn more.
Hopefully, these tips will help you make Zoom less of a barrier in the classroom. It definitely isn’t the same as face-to-face instruction, but if you’re attentive to community, it can be a little better.
Faculty point of contact:
- Pam Lach (Digital Humanities Librarian). plach@sdsu.edu